浏览器插件形式改变指纹
指纹浏览器系列教程目录:
一、指纹浏览器的原理与应用
二、浏览器指纹的检测与对抗的办法
三、更多的检测手段与指纹浏览器选购方案
四、命令行形式浏览器多开解决方案
五、浏览器插件形式改变指纹
六、node.js库Puppeteer改变浏览器指纹信息
七、python改变浏览器指纹信息
八、java、go、c#、php、rust更改浏览器指纹信息
九、编写自己的指纹浏览器以及指纹信息来源
十、闲话聊一聊指纹浏览器的用途
puppeteer实在是太有名了,这里就不做多的介绍了,总之就是谷歌官方给谷歌浏览器配套的自动化测试工具。
具体使用教程太多了,这里就不讲那些基础的了,只是说下如何伪装浏览器的指纹。
因为puppeteer太有名,用的人多,所以就有人给它开发了第三方的插件。
今天我们要说的插件就是https://github.com/berstend/puppeteer-extra 这个库里面的stealth。
地址:
https://github.com/berstend/puppeteer-extra/blob/master/packages/puppeteer-extra-plugin-stealth
它通过勾住browser的page创建过程,将反指纹检测js代码插入到page里,做到伪装或隐藏浏览器指纹的作用。
具体步骤:
安装这些库npm install puppeteer puppeteer-extra puppeteer-extra-plugin-stealth
运行代码
// puppeteer-extra is a drop-in replacement for puppeteer,
// it augments the installed puppeteer with plugin functionality
const puppeteer = require('puppeteer-extra')

// add stealth plugin and use defaults (all evasion techniques)
const StealthPlugin = require('puppeteer-extra-plugin-stealth')
puppeteer.use(StealthPlugin())

// puppeteer usage as normal
puppeteer.launch({ headless: true }).then(async browser => {
  console.log('Running tests..')
  const page = await browser.newPage()
  await page.goto('https://bot.sannysoft.com')
  await page.waitForTimeout(5000)
  await page.screenshot({ path: 'testresult.png', fullPage: true })
  await browser.close()
  console.log(`All done, check the screenshot. ✨`)
})
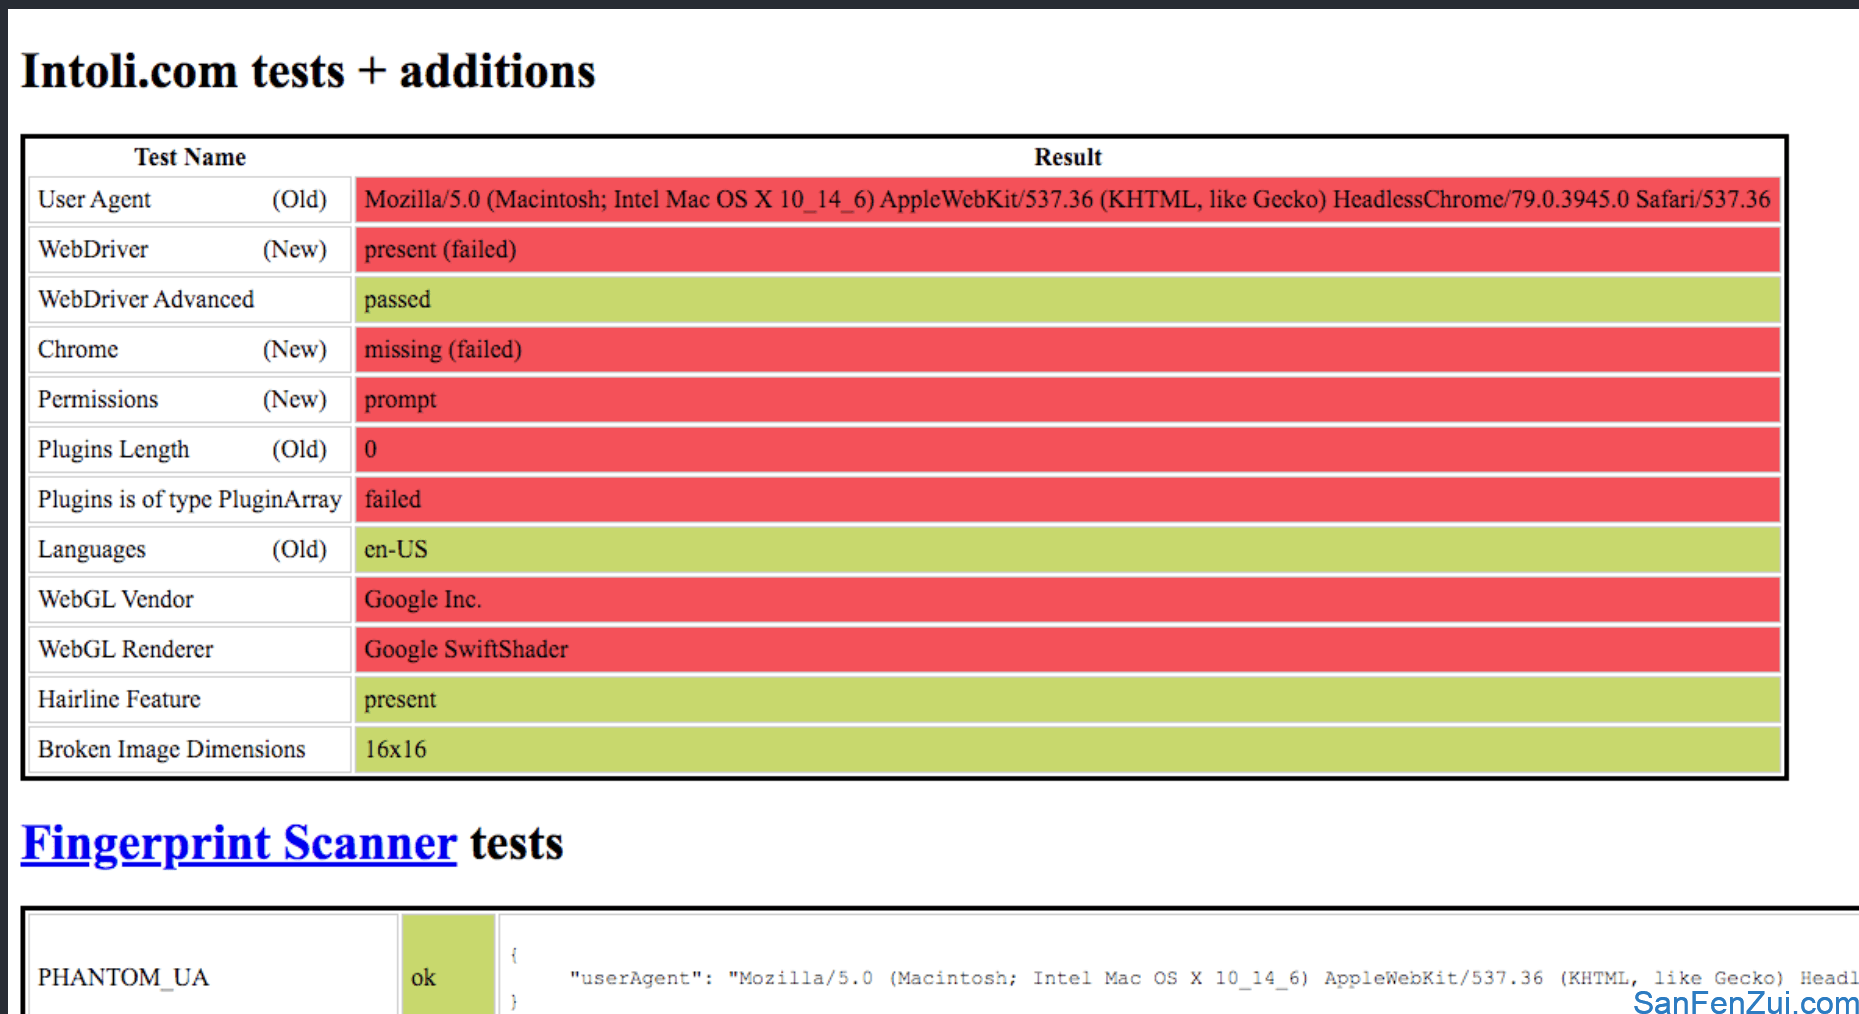
默认不设置浏览器是以无界面的headless模式运行的,而这个模式下,网站是可以知道你是在这种爬虫模式而非正常人访问模式的,也就是js可以检测到webdriver为true。
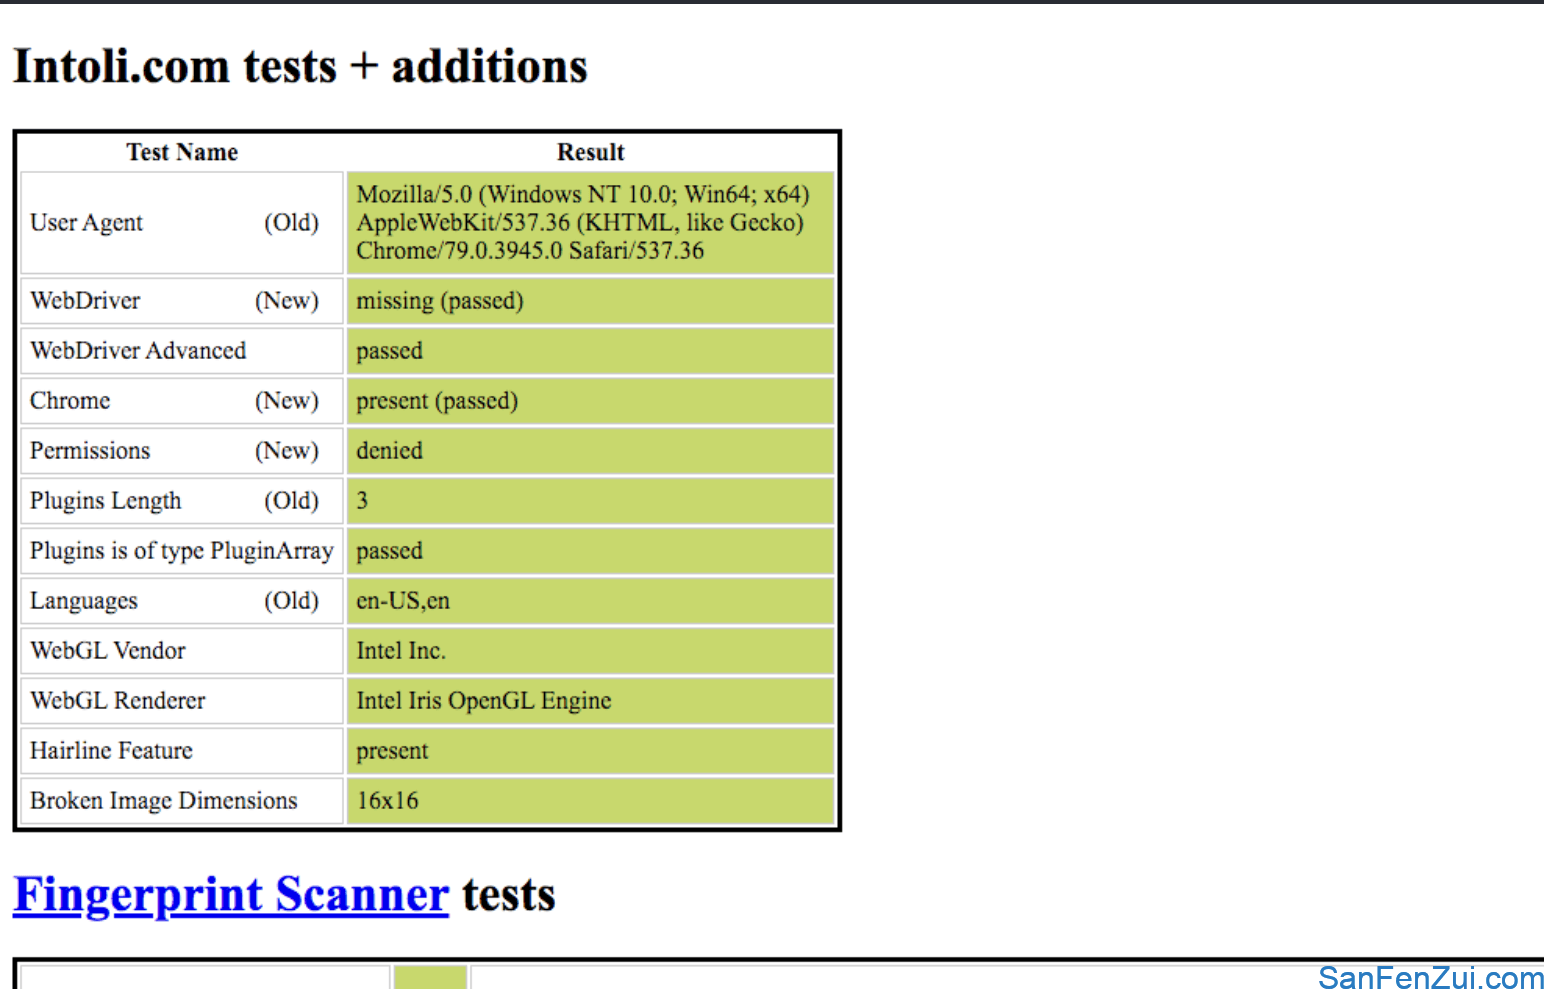
那么当加载了这个stealth插件后,网站就不会检测到这些信息了,非常好用。
下面是不使用stealth插件在无头模式下访问指纹检测网站的截图:

下面是使用stealth插件后访问在线指纹检测网站的截图:

可以看到对比相当明显,这个插件虽然好用,但是它里面的指纹信息都是固定的,没法自定义,如果需要自定义就需要对这个插件进行二次开发了。
puppeteer-extra这个插件里面还有adBlocker和反谷歌验证码等功能,非常强大,有需要的可以都去尝试下。
本文由三分醉博客原创,转载请注明:https://www.sanfenzui.com/node-js-library-puppeter-changes-browser-fingerprint-information.html
文章同步更新在知乎:三分醉 - 知乎


